Language Localization with StoreConnect
A Guide to Creating Multilingual Online Stores
The ability to cater to diverse audiences in a variety of geographic locations is essential for the success of the majority of online business models. StoreConnect, built entirely on Salesforce, offers robust theming and templating capabilities and provides an ideal platform for creating multilingual and multi-regional online stores.
This guide will walk you through the process of setting up a simple example language translation (Latin American Spanish) to pinpoint a regional market, leveraging the power of StoreConnect and Salesforce.
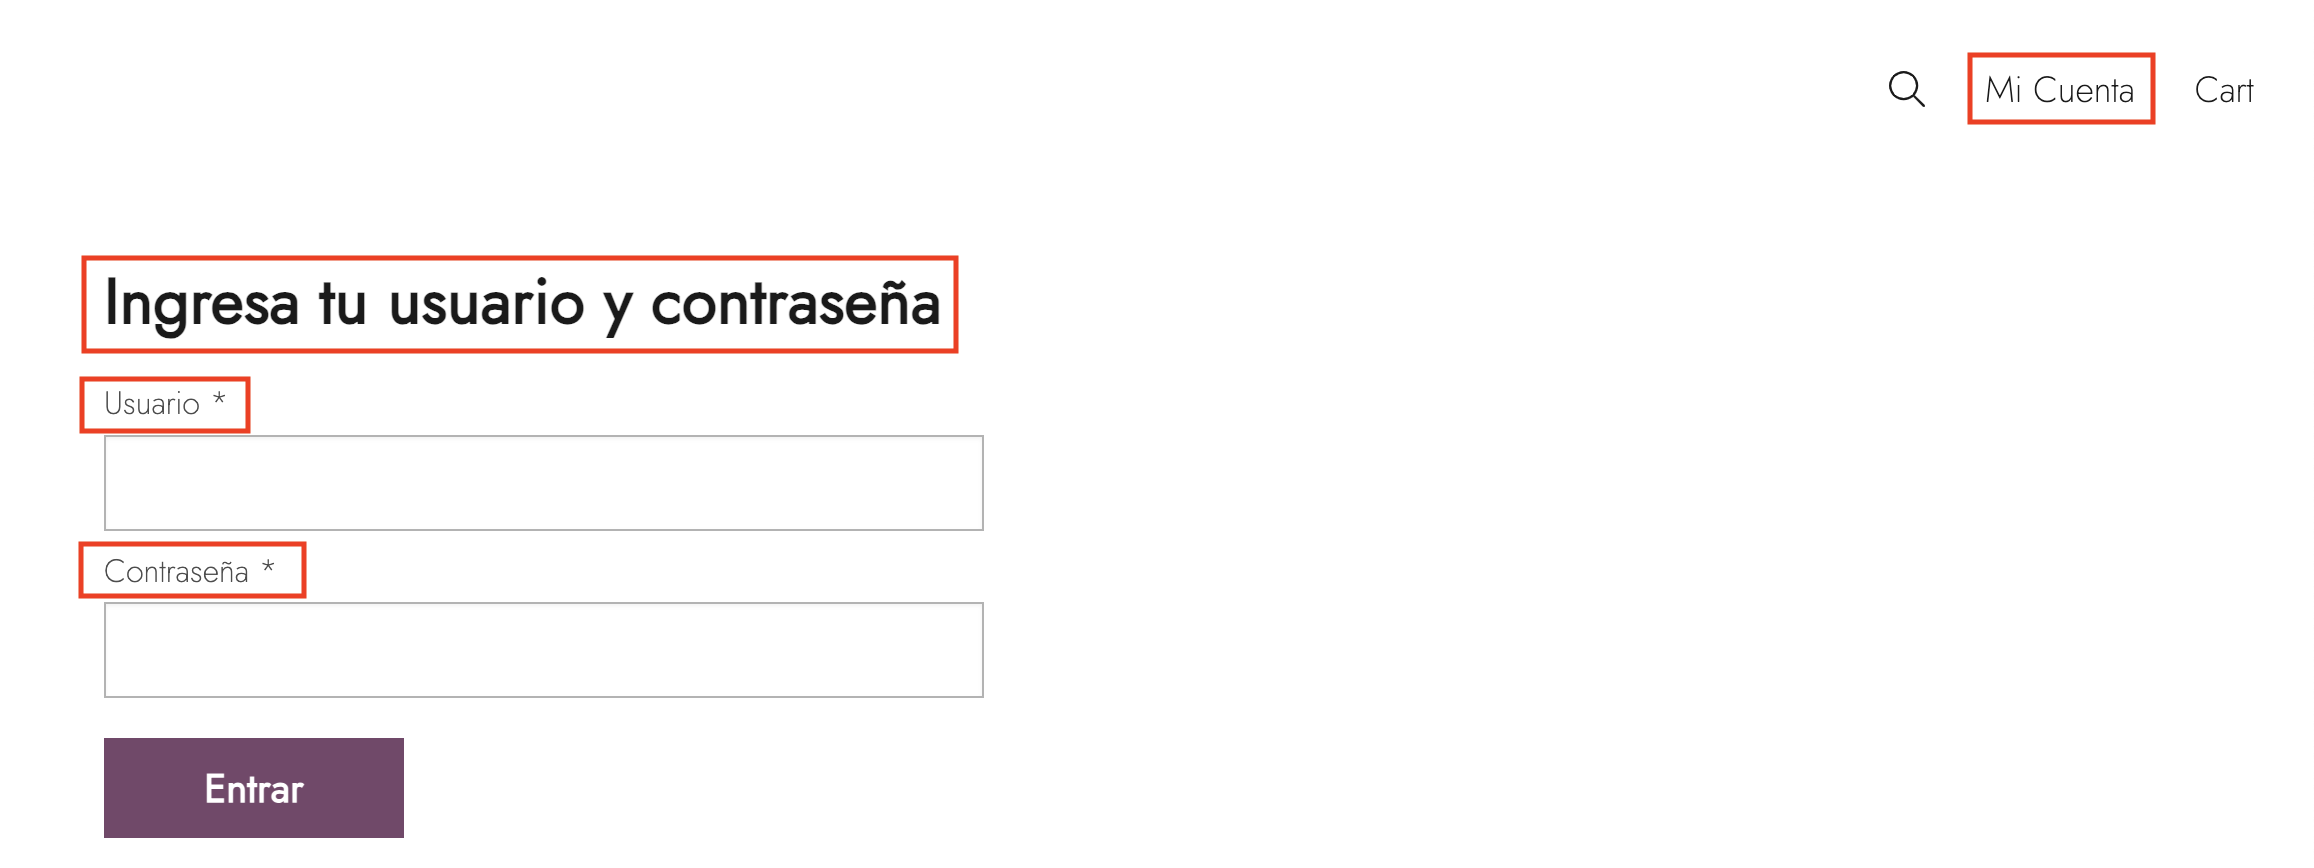
Translating content into a regional language is an important step in this process. This guide will use the “Beauty Demo Store”, which is installed with a StoreConnect Trial installation as explained here. We will configure the “Log In” and “My Account” labels and the login form to display in South American Spanish as seen below:
1. Install StoreConnect
To host this on a website, we need to get StoreConnect installed, as described here
Once this is complete, you should have a StoreConnect Store and Site that is accessible online.
2. Ensure you have a StoreConnect store set up and the store has a Theme defined
Themes in StoreConnect are collections of display and logic elements applied to a site. They define how content is presented and interacted with, offering a singular yet adaptable design across different pages. Once StoreConnect is installed, three Primary objects/values work in conjunction to enable content to be viewed in different languages:
- ‘Theme’ Configuration
- ‘Language Locale’ Configuration
- ‘Language Locale Translation’ Configuration
*Please insure that the user handling these configurations has access to these Objects/Records as described in the Install StoreConnect guide.
Localization is typically done in the setup phase of a store/sub-store .
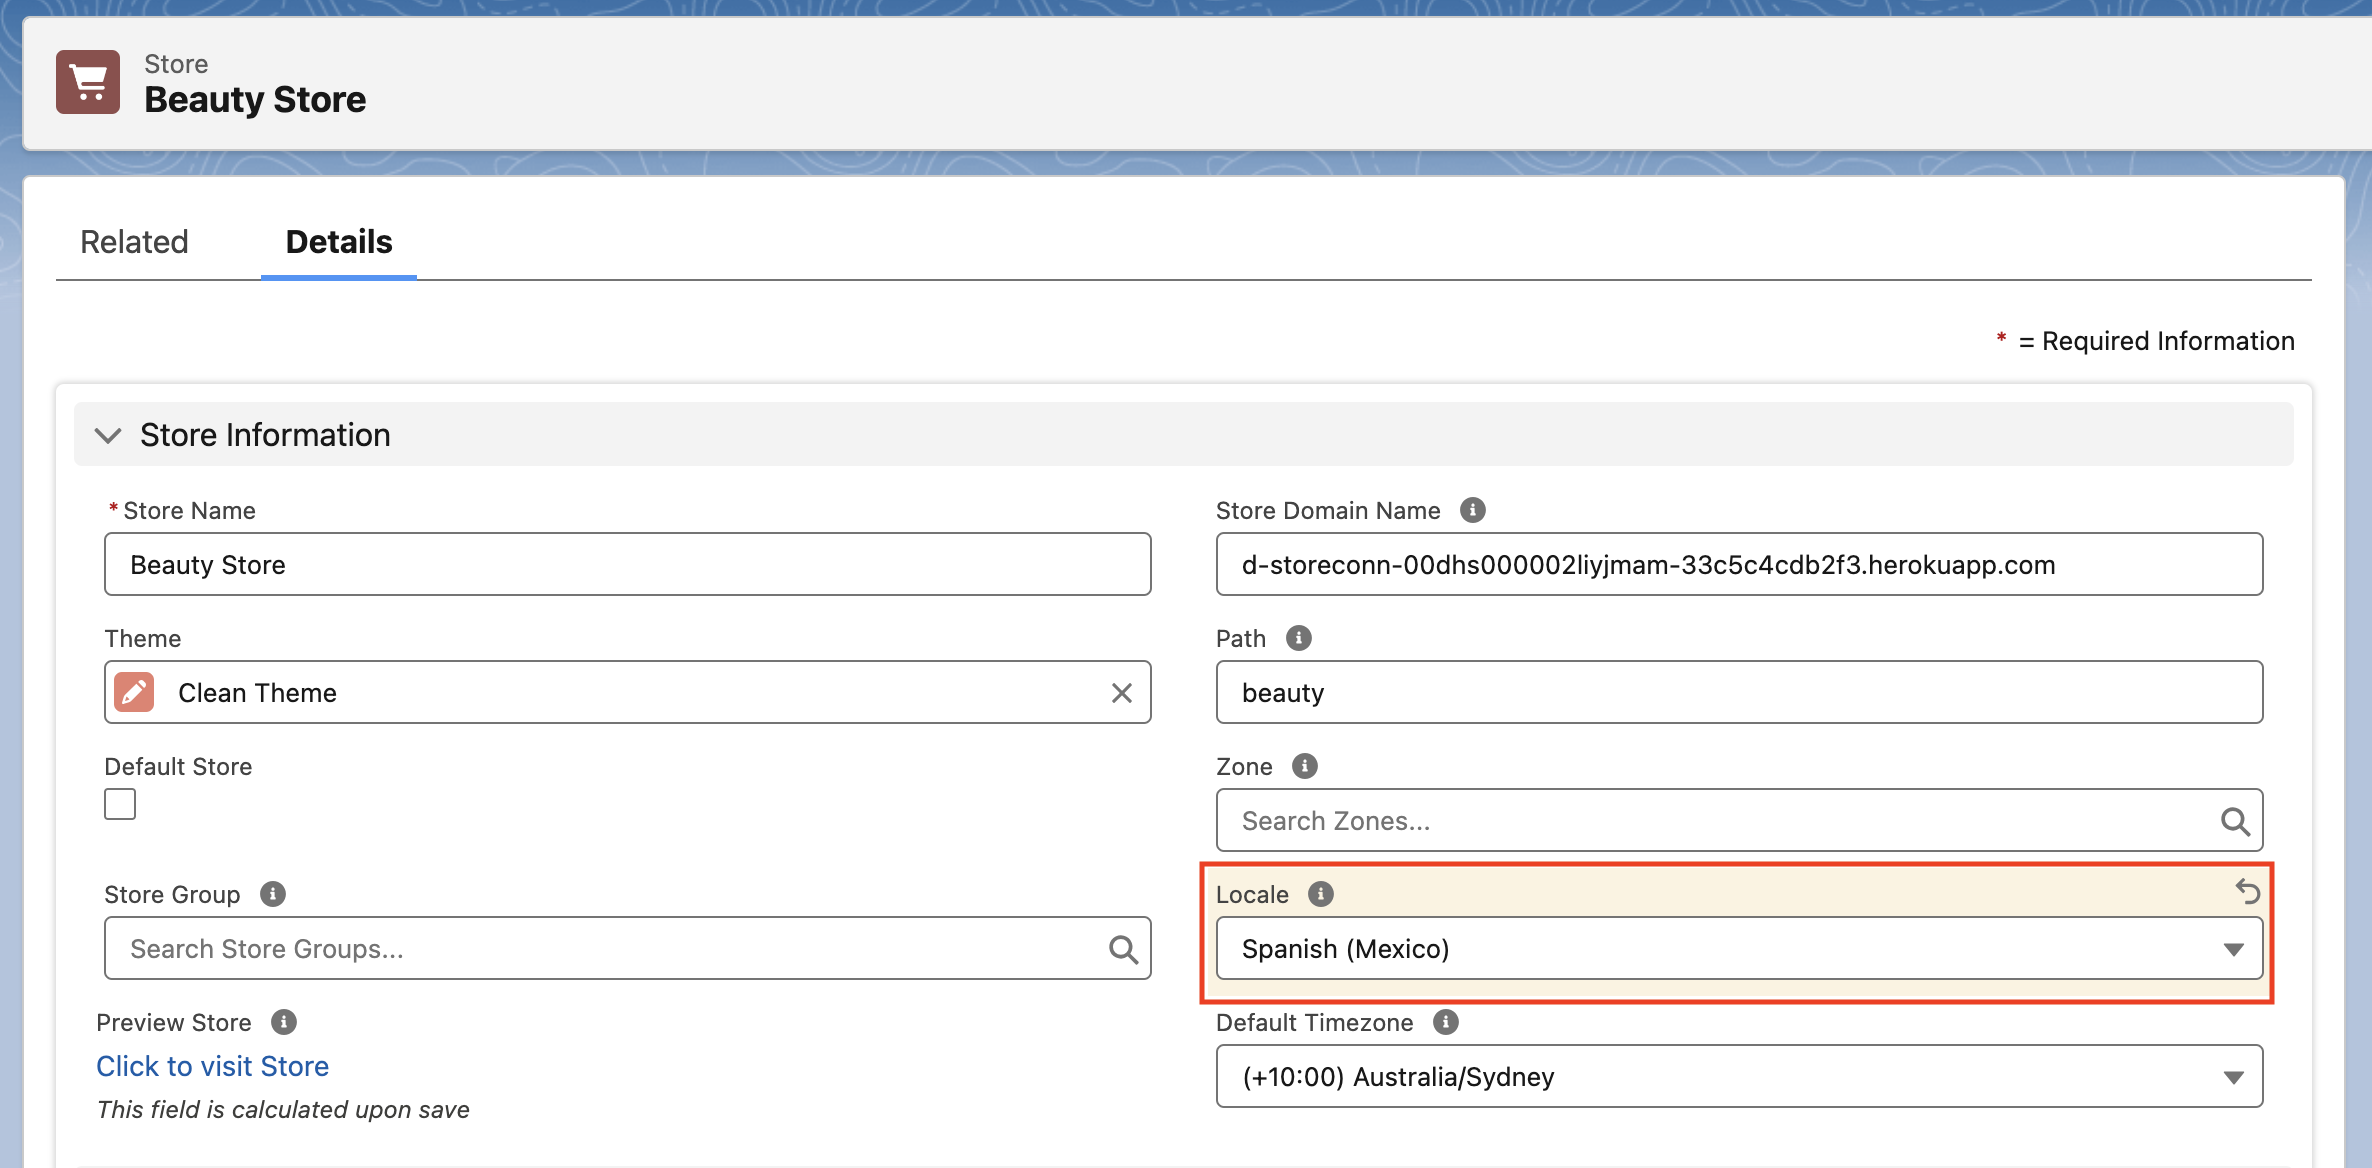
- Click on the “Store” tab and select a store as a target for the language desired
- Once the store is selected, click on the value shown in the “Theme” field value. *If this field does not contain a value, select a theme (or optionally create one)
- Select a value in the “Locale” drop-down. This will be the language visible on the public site. In this example, we will choose
Spanish (Mexican)
3. Implement Theme Locales for Language Variants
Each theme can have multiple locales, which enable the presentation of a storefront in a given language. To set up a given language, define a locale for your theme:
- Click on the
Related Listtab of the theme - Navigate to the
Localessection - Click the
Newbutton to define a new Locale to define the language desired - Give the
Theme Locale Namea meaningful name (in this guide, it will be ‘Spanish (Mexico)’ and select the language this Locale will display by selecting the language in theLocaledrop-down list. Likewise, we will select ‘Spanish (Mexico)’ from the available values in the picklist - Enable the
Activevalue to make the language available to display in the current storefront. In this example we will activate the “Spanish (Mexican)” Theme Locale

4. Define Theme Locale Translations and Key Values
Theme locales have translations that correspond to specific key values found in the front-end presentation. These keys are linked to Salesforce records and fields, allowing for dynamic content display, based on the selected language of the theme. Replacing an entire list of terms on an interface is most quickly achieved by a bulk upload in a CSV file via DataLoader.
For the purposes of this guide, we will focus on replacing the login flow with a few selected terms for their respective object keys:
- ‘Log in’ (Link) -
header.dropdowns.account.login - ‘Sign in to your account’ -
auth.login.heading - ‘Username’ -
auth.login.form.username - ‘Password’ -
auth.login.form.password - ‘Log in’ (Button Label) -
auth.login.form.submit
We will add the display of these values in Latin American Spanish with the following Spanish terms:
- ‘Mi Cuenta’ (Link) -
header.dropdowns.account.login - ‘Ingresa tu usuario y contraseña.’ -
auth.login.heading - ‘Usuario’ -
auth.login.form.username - ‘Contraseña’ -
auth.login.form.password - ‘Entrar’ (Button Label) -
auth.login.form.submit
5. Add Theme Locale Translations and Key Values
To add these specific value keys, we will do the following:
- Click on the
Related Liststab of a the Language Locale - Select ‘Spanish (Mexico)’
- Select the
Relatedtab - Select the
Newbutton on the right - Add the key value (eg. header.dropdowns.account.login) with the string value to present when that key is found in the interface (eg. ‘Mi Cuenta’)
- Click
Save - Repeat this for the other terms in the list above
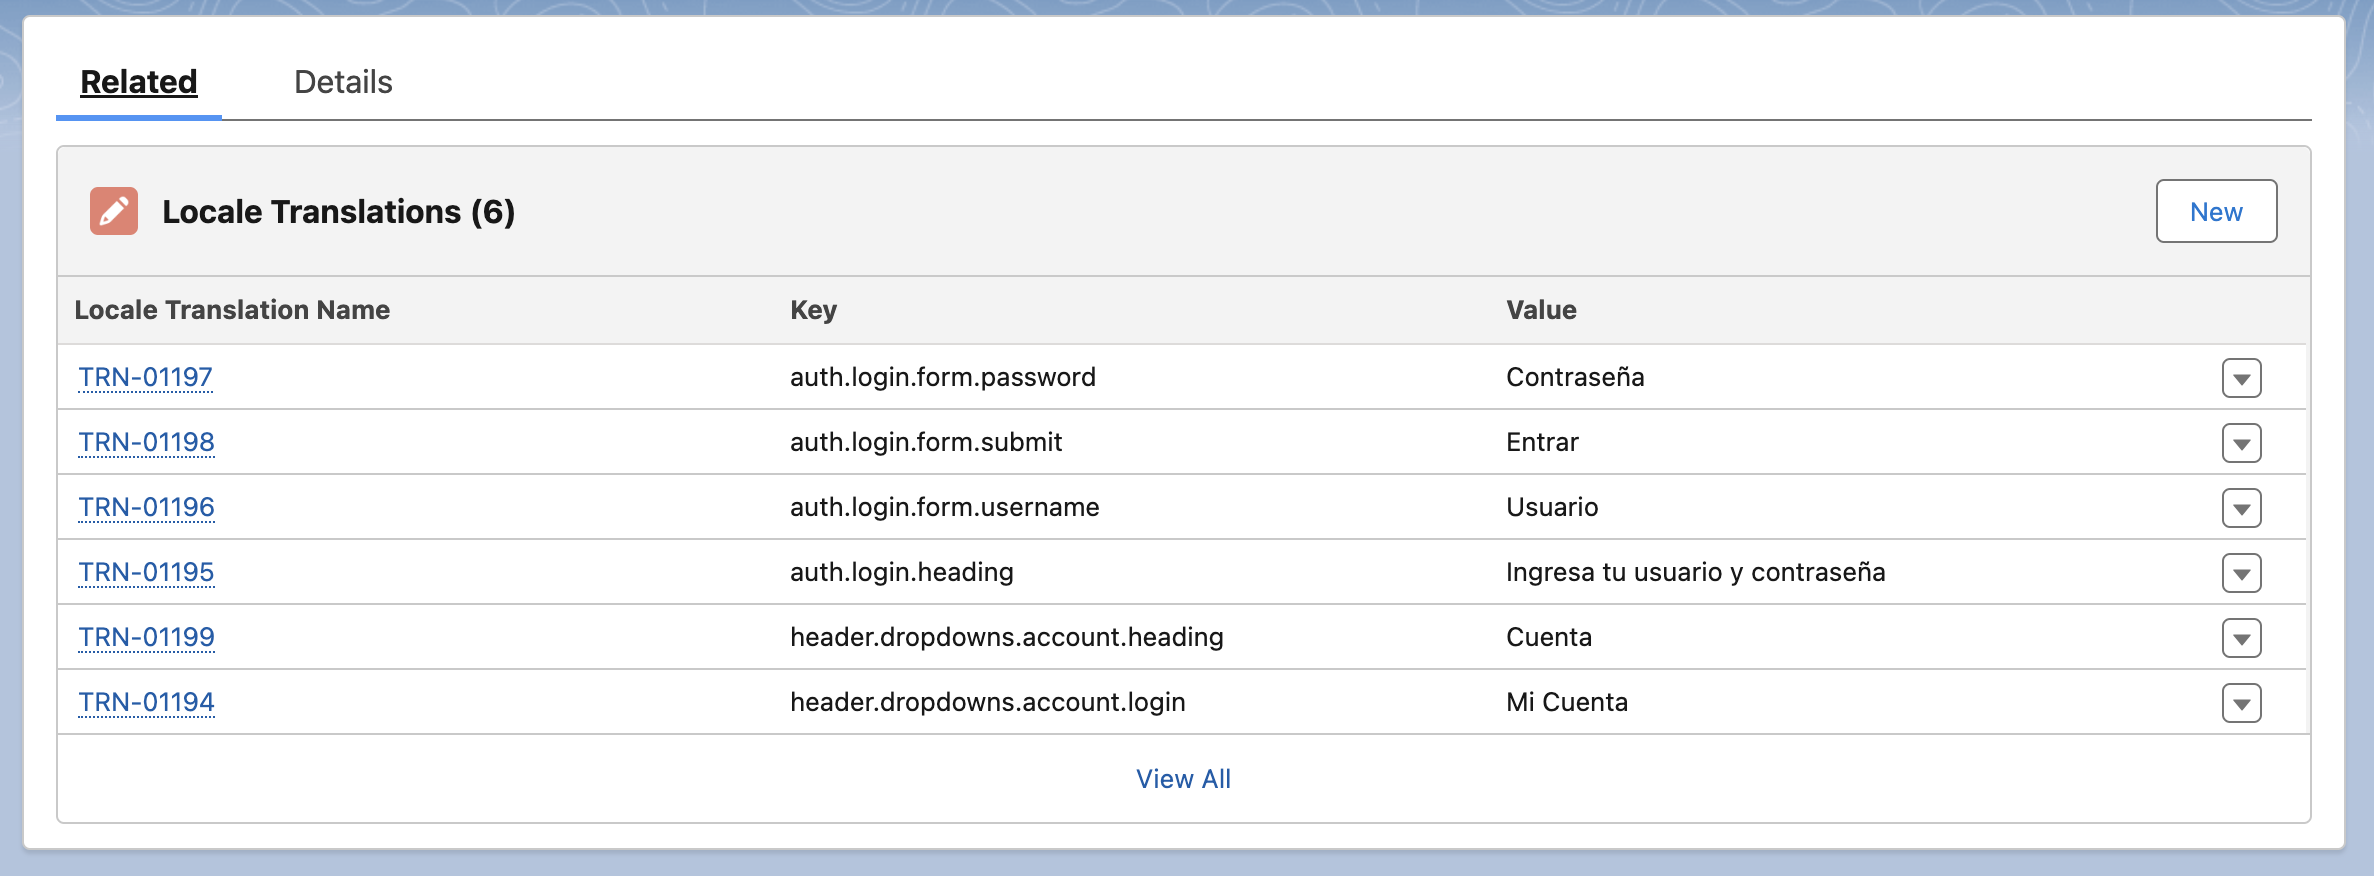
6. Test your language implementation:
- Ensure that the “Locale” field for the store is set to ‘Spanish (Mexico)’ (See Step 2 above)
- Go to your public storefront
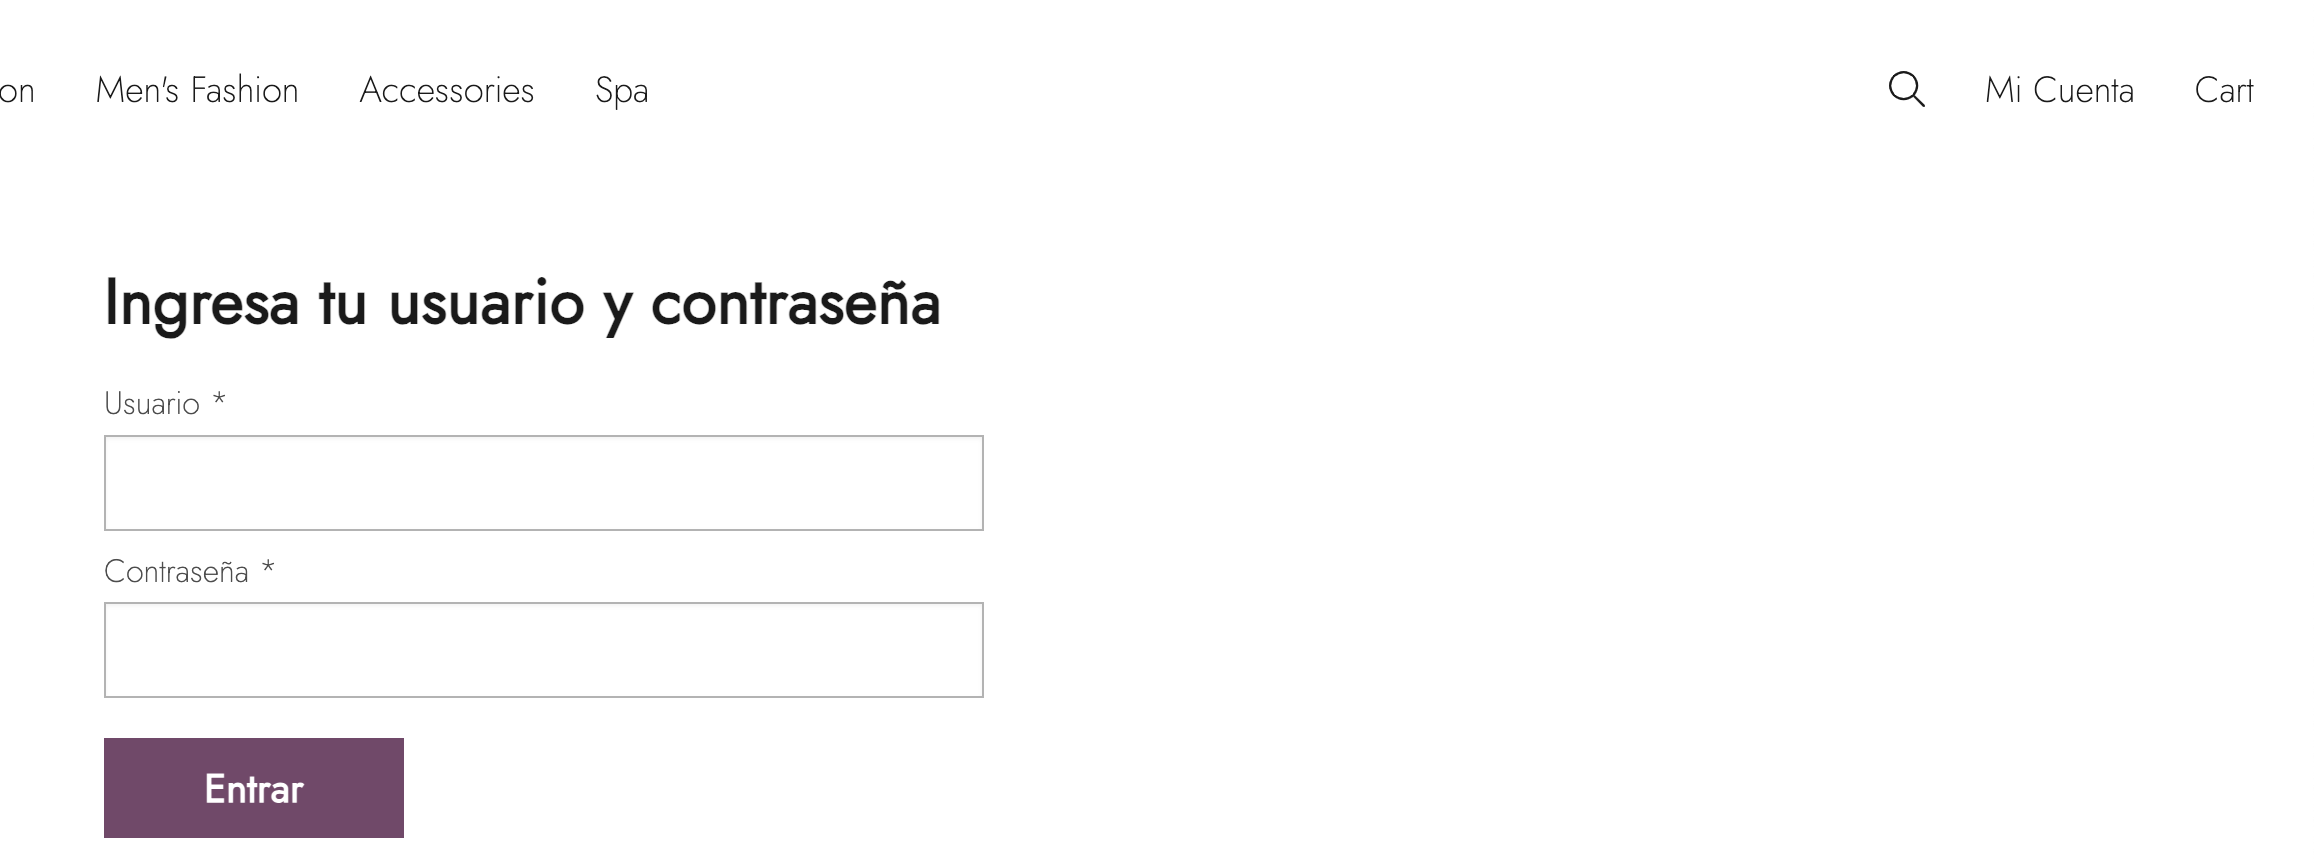
- Check the location of the ‘Log in’ link on your storefront. This guide is using the ‘Clean Theme’ which is installed with StoreConnect Trial installs. This link appears in the upper right and should now display as ‘Mi Cuenta’
- Click the ‘Mi Cuenta’ link
- Check the log in form. This should now present the Spanish terms we have defined